
Open the DexBots bot management panel
https://elixoai.com/en/dexbots/
1. Create your first bot from a ready-made Dimkud Multi preset
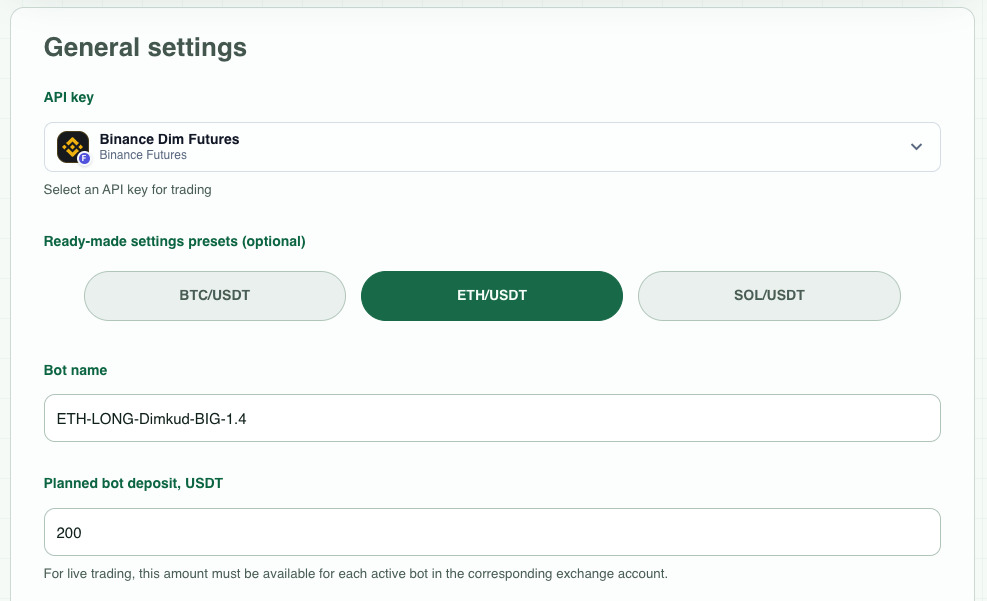
We have created two versions of the bot creation page.
- Simplified form for creating your first bots.
Creates a ready-to-use bot for BTC, ETH, and SOL with the conservative “Dimkud Multi” settings preset.
This form contains only the minimum required parameters, and you do not need to add an exchange API key in advance.
Go to the simple form:
https://elixoai.com/dexbots/create-simple.php
Please note, however, that to put the bot into real operation, you will still need to connect your exchange via API afterward. - Full bot creation form
A complete form for creating and fine-tuning trading bots. It is suitable for creating bots for any currencies, both with ready-made “Dimkud Multi” settings presets and with any custom settings.
It contains all parameters and settings available for editing.
This form works if you have already added your exchange to the system via API.
Go to the full form:
https://elixoai.com/dexbots/create_bot.php
👉 Description of the full bot creation procedure:
- Select the exchange API key you added earlier, a supported pair (for example, “BTC/USDT”, “ETH/USDT”, etc.), and the Long direction.
- In the “Ready-made settings presets” section, select the Dimkud Multi preset specifically for that pair and click “Load settings”.
- Check the loaded bot parameters: number of orders, grid coverage, Take Profit, and Stop Loss.
- Set the desired “Leverage” (no more than 5x, preferably less) and “Bot deposit” (the amount you allocate to this bot).
For all bots to operate correctly, the exchange must have the full amount for each bot, plus a mandatory additional reserve equal to 100%–200% of the total amount for all active bots that may start simultaneously.
Use the bot amount calculator to calculate the amount per bot if you plan to run several bots simultaneously. - In the “Start signal builder”, select “Dimkud Multi 30” or “Dimkud Multi 15”. These are our preset signals selected to work with the “Dimkud Multi” presets.
Option 30 usually produces more entries but also a higher drawdown; option 15 is more selective and is generally more conservative in a falling market. - Save the bot. It should be created and move to the “Waiting for signal” status.
Read the complete guide to Dimkud Multi presets and signals
https://elixoai.com/en/docs/start-bots-signal/dimkud-multi/
2. Prepare your exchange account
Select one of the supported exchanges and fund your exchange balance. The following are currently supported: Binance, Bybit, and Hyperliquid.
For Binance and Bybit, we recommend funding in USDT; for Hyperliquid, you must use USDC.
Please note:
- On Binance, Futures and Spot accounts are separate. The initial deposit normally goes to the Spot account. To trade Futures, transfer the required amount from the Spot account to the Futures account within Binance.
- Bybit currently uses a “Unified Trading Account”. To trade on Bybit, your funds must be in this Unified Trading Account. You will then be able to trade on both the Spot and Futures/Derivatives markets.
- On Hyperliquid, funds must be in the “Unified Account”.
3. Create an API key on the exchange
Create a separate API key with read and trading permissions for the Futures or Spot markets, depending on the type of bot you want to create.
Be sure NOT to enable withdrawals in the API settings. This prevents anyone from withdrawing your funds from the exchange even if they know the API key credentials.
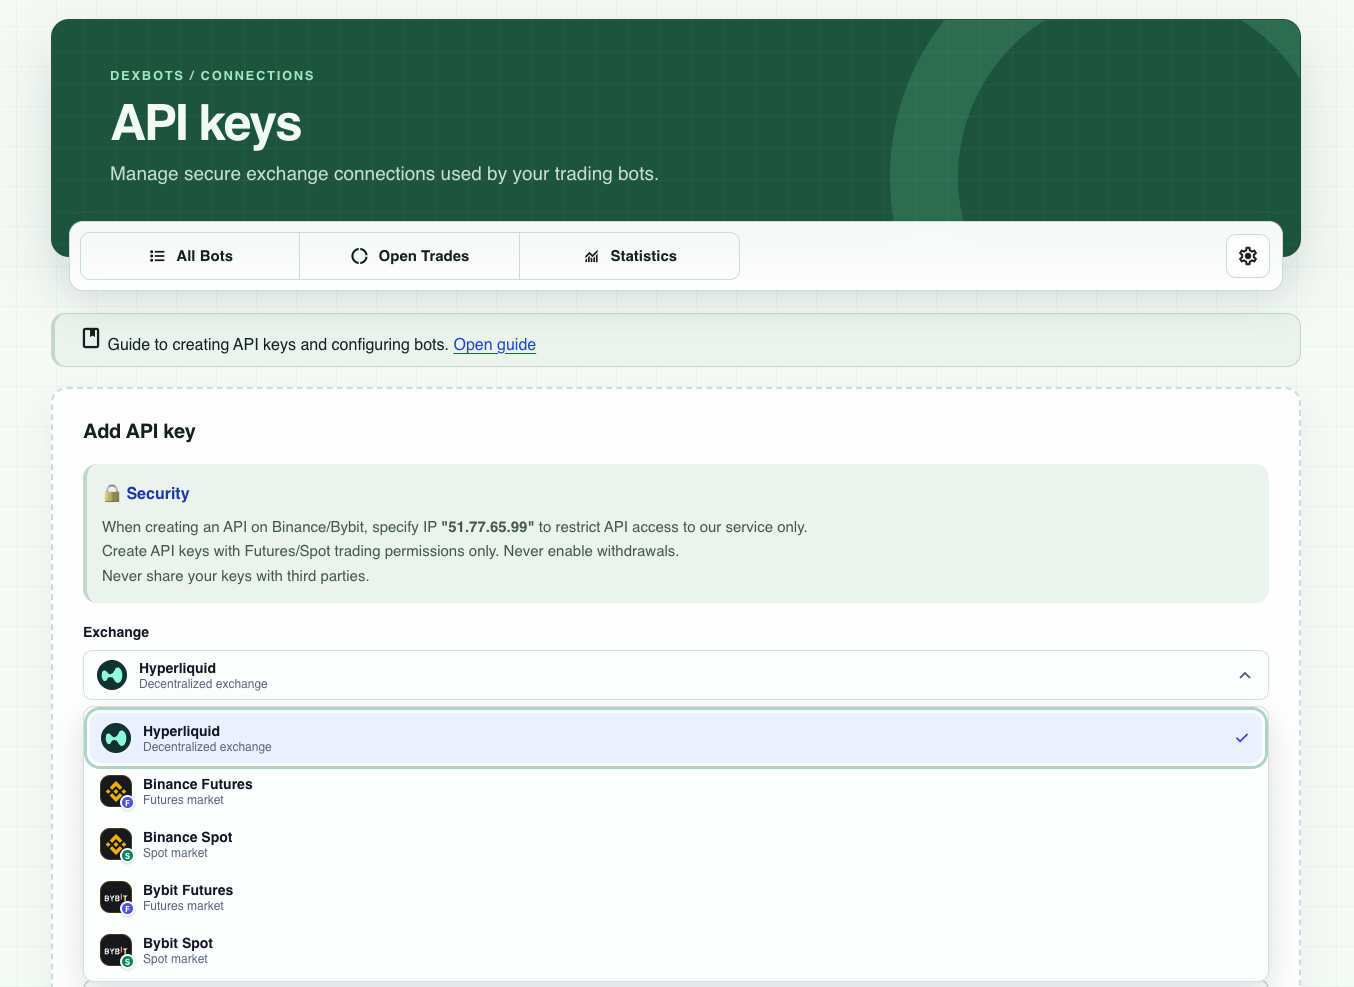
When creating an API on Binance or Bybit, add the current server IP from the DexBots instructions to the exchange allowlist. It is currently 51.77.65.99. This means your API key will accept commands only from this IP and ignore requests from elsewhere.
Use the detailed instructions for your exchange:
- Hyperliquid instructions. Hyperliquid API.
- Binance Futures instructions. Binance API.
- Bybit Futures instructions. Bybit API.
4. Add the API key to ELIXOAI
Go to the API keys page in ELIXOAI, select the exchange, and paste the API Key and Secret Key into the corresponding fields. Save the connection.
5. Select your API key in the bot settings
If you previously used the simplified bot creation form, you may have created a bot without selecting a real exchange API key.
Now, after adding the API to the Elixo settings, open the bot editing section, select your API key there, and save the settings.
Go to the page containing the list of all your bots and click “Edit” for the required bot.
After saving the bot settings with the API key, return to the bot list and click “Activate”.
That is all. Your bot will move to the “Waiting for signal” status and start when a start signal arrives.
PS. If you had already added an API key and created bots using the full creation form, you can skip this step. Once created, the bots will immediately have the “Waiting for signal” status.
6. When you are ready, create the full set with Bots Wizard
After testing one bot, you can create more bots for different currency pairs. You can create bots with your own settings or use ready-made “Dimkud Multi” presets for leading currencies.
If you want to create several bots with presets, open Bots Wizard, a tool for bulk creation of DCA bots for selected currencies.
Select the API key, Dimkud Multi signal, total deposit, “bots : reserve” ratio, and the limit on simultaneously operating bots.
The wizard can then create all 20 available Dimkud Multi bots for different currencies in a single operation.
https://elixoai.com/dexbots/botwizard.php
Creating 20 bots does not mean that 20 trades must open simultaneously. Configure the overall limit and the Long/Short limits according to a balance capable of supporting the grids, and keep a free reserve for DCA orders.
We recommend configuring no more than 7–10 bots to start simultaneously. Detailed guide to bot-count restrictions.
7. Information: how our DCA bots work
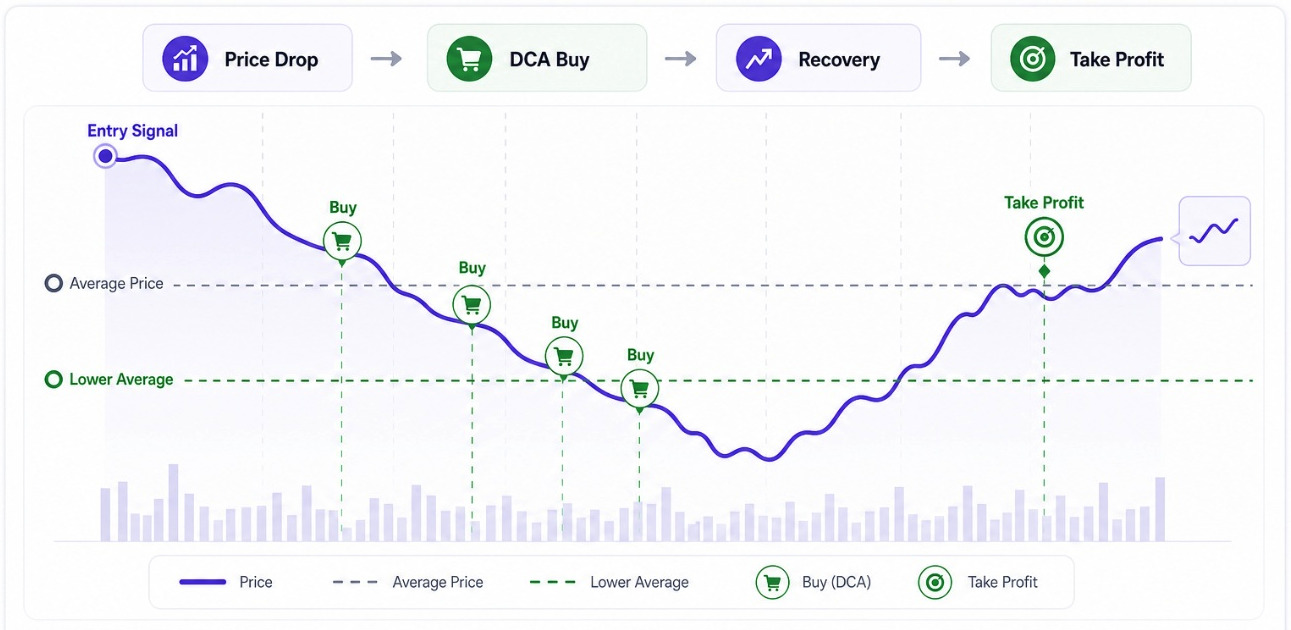
The bot opens its first order only after receiving a start signal. If the price moves against the position (falls for a Long bot), the exchange executes the grid buy orders whose prices and amounts were calculated in advance.
This averages our position and brings the average entry price, as well as the Take Profit price, closer to the asset’s current market price.
After the market reverses, the position is closed at Take Profit.
The DCA algorithm (building a position in parts) does not eliminate risk completely, but reduces it compared with opening the entire position using one large order. However, during a strong one-way move, the floating drawdown may increase significantly and lead to losses and liquidations if trading risks, such as the bot deposit amounts or leverage, are set too high.
From a technical standpoint, our software opens and closes trades directly on your exchange through secure API keys, without any ability to withdraw funds from your account. Users do not need to transfer funds to Elixo Bots.